PicoCTF: Low Level Binary Intro - Intro to Assembly#
This PicoCTF Playlist section is called “Intro to Assembly”, the challenges will go deeper into assembly values, I’ve already played with some low level code like IDA and Microcorruption, but maybe it will be fun to revisit some concepts.
Bit-O-Asm-1#
The first challenge is pretty simple, we have an assembly dump file, and we need to know what is the value in the EAX.
So, what is an assembly dump?
An executable file can be read as low level language, making machine code be interpreted as assembly code. This can be human-readable code, used for reverse engineering, taking these commands and transforming into C++ for example, so the users can understand and re-compile the original code.
With that in mind, the computer also have some registers, that store values for computer calculation, one of them is called EAX, and we need the value stored in them.
Here’s the dump file:
<+0>:     endbr64
<+4>:     push   rbp
<+5>:     mov    rbp,rsp
<+8>:     mov    DWORD PTR [rbp-0x4],edi
<+11>:    mov    QWORD PTR [rbp-0x10],rsi
<+15>:    mov    eax,0x30
<+20>:    pop    rbp
<+21>:    ret
The values in assembly works just like a variable in a programming language, so in line <+15> we have
MOV (move the value to)
EAX, 0x30 (from 0x30 to EAX, making EAX = 0x30)
But we actually need the decimal value, so we put it in our python script HexToDec.py, like this:
python3 HexToDec.py 0x30We take the result and format as picoCTF{value} and we have the flag:
Answer:Flag 1
picoCTF{48}Bit-O-Asm-2#
This one have the same solution and steps as the last one, actually all the challenges in this document have the same steps, with something more to it.
This one should teach that a value can be pointed to another address, in this case we want the value in EAX, but the value is actually a line above, that’s because assembly can have relative addresses. The address is RBP(register) -0x4(minus 4 from the register address).
(just focus on the lines <+15> and <+22>)
<+0>:     endbr64
<+4>:     push   rbp
<+5>:     mov    rbp,rsp
<+8>:     mov    DWORD PTR [rbp-0x14],edi
<+11>:    mov    QWORD PTR [rbp-0x20],rsi
<+15>:    mov    DWORD PTR [rbp-0x4],0x9fe1a
<+22>:    mov    eax,DWORD PTR [rbp-0x4]
<+25>:    pop    rbp
<+26>:    ret
The solution is the decimal value of 0x9fe1a, so we put it in our python script HexToDec.py, and the answer will be revealed:
python3 HexToDec.py 0x9fe1aAnswer:Flag 2
picoCTF{654874}Bit-O-Asm-3#
This one teaches us operations, like multiplication and addition in assembly.
<+0>:     endbr64
<+4>:     push   rbp
<+5>:     mov    rbp,rsp
<+8>:     mov    DWORD PTR [rbp-0x14],edi
<+11>:    mov    QWORD PTR [rbp-0x20],rsi
<+15>:    mov    DWORD PTR [rbp-0xc],0x9fe1a
<+22>:    mov    DWORD PTR [rbp-0x8],0x4
<+29>:    mov    eax,DWORD PTR [rbp-0xc]
<+32>:    imul   eax,DWORD PTR [rbp-0x8]
<+36>:    add    eax,0x1f5
<+41>:    mov    DWORD PTR [rbp-0x4],eax
<+44>:    mov    eax,DWORD PTR [rbp-0x4]
<+47>:    pop    rbp
<+48>:    ret
In this case we need to track where the EAX is/was, and can have the last result (because it will be modified through the dump file)
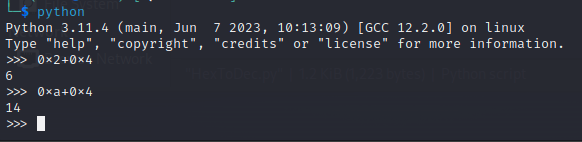
For multiplication and addition for Hex values, we will use python terminal and make the calculations there. Just type python in terminal/cmd and we are set:
- At
<+29>we have the set of value toEAX, value at addressRBP-0xC - At
<+15>the value toRBP-0xCis set to0x9fe1a, makingEAX=0x9fe1a - At
<+32>the EAX is multiplied by the value at addressRBP-0x8 - At
<+22>the value toRBP-0x8is set to0x4, makingEAX=0x9fe1a * 0x4 = 0x27F868 - At
<+36>we have the value0x1f5added toEAX, making itEAX=0x27F868 + 0x1f5 = 0x27FA5D
The solution is the decimal value of 0x27FA5D, so we put it in our python script HexToDec.py to have the answer:
python3 HexToDec.py 0x27FA5DAnswer:Flag 3
picoCTF{2619997}Bit-O-Asm-4#
This one teaches us comparisons and branching code (also known as if, elseif, else) and jumps.
<+0>:     endbr64
<+4>:     push   rbp
<+5>:     mov    rbp,rsp
<+8>:     mov    DWORD PTR [rbp-0x14],edi
<+11>:    mov    QWORD PTR [rbp-0x20],rsi
<+15>:    mov    DWORD PTR [rbp-0x4],0x9fe1a
<+22>:    cmp    DWORD PTR [rbp-0x4],0x2710
<+29>:    jle    0x55555555514e <main+37>
<+31>:    sub    DWORD PTR [rbp-0x4],0x65
<+35>:    jmp    0x555555555152 <main+41>
<+37>:    add    DWORD PTR [rbp-0x4],0x65
<+41>:    mov    eax,DWORD PTR [rbp-0x4]
<+44>:    pop    rbp
<+45>: ret- At the line
<+22>it compares(CMP) the values atRBP-0x4address and0x2710and the result will be stored. - At the line
<+29>it checks the Compare operation if the result is equal or less of the last values [other way to see is(RBP-0x4) <= 0x2710]. If it’s true (ifRBP-0x4is less or equal0x2710) then jump to the line<+37>, if it does not, then keep going through the line<+31>
This is kinda difficult to explain, but the J in jmp or jle means jump, that’s kinda a GOTO another line. And the cmp is a Compare, something like an IF command.
Going step by step:
- Line
<+22>Compare theRBP-0x4address and0x2710values - Line
<+15>Set value atRBP-0x4address to0x9fe1a, making the comparison0x2710and0x9fe1a - Line
<+29>Compare if0x9fe1ais equal or less than0x2710, it is not, the statement is false, so No Jump happens - Line
<+31>subtract (SUB) value atRBP-0x4address by0x65, making itRBP-0x4=0x9fe1a-0x65 = 0x9FDB5 - Line
<+35>Jump (jmp) to the line<+41> - Line
<+41>SetEAXvalue as the value atRBP-0x4. SoEAX=0x9FDB5
The solution is the decimal value of 0x9FDB5, so we put it in our python script HexToDec.py and the answer is revealed:
python3 HexToDec.py 0x9FDB5Answer:Flag 4
picoCTF{654773}